こんにちは堤です。
最近ゼルダのプレイ時間が100時間を超えましたが、まったく終わる気配がなくて困ってます。
さて、本題ですが、ChatGPTではプラグインが公開されて盛り上がっていますね!
以前申請していたChatGPT PluginsのDeveloperのアクセス権が最近付与されていたので、実際に自分でも何かプラグインを作成してみたいと思います。
ChatGPT Pluginsとは
ChatGPT Pluginsは、ChatGPTとサードパーティのアプリケーションを接続して、拡張機能として利用できる機能です。サードパーティのアプリケーションと接続することで、素のChatGPTではできない、様々なタスクを実行することができます。
- 最新情報の取得
ChatGPTは2021年までの情報しか保持していませんが、プラグインでブラウジング等を行うことで、最新の情報も扱うことができます。
- ユーザーの代わりにアクションを行う
ホテル予約サービスやレストラン予約サービスなどと組み合わせることで、ChatGPTと対話しながらホテルやレストランの予約が可能となります。
日本の企業では食べログや価格.comのサービスが現在プラグインとして公開されており、利用することができます。
作り方
作成手順は大きく分けて次の3つになります。
- APIの作成
- マニフェストファイルの作成
- OpenAPI ドキュメントの作成
1. APIの作成
プラグイン用のAPIを実装していきます。 今回は例としてNews APIを使ってニュースを検索してくれるプラグインを作成してみたいと思います。
公式でプラグインのサンプルが出ているので、これを参考に作成します。
サンプルではTODOリストのプラグインを作成しており、API作成にはquartというフレームワークを使用しているのでそちらを使用していきます。 作成したファイルは以下の通りです。
import json
import requests
import quart
import quart_cors
from quart import request

app = quart_cors.cors(quart.Quart(__name__), allow_origin="https://chat.openai.com",allow_methods="*")

def search_news(query, api_key=API_KEY):
    url = "https://newsapi.org/v2/everything"
    parameters = {
        "q": query,  # 検索クエリを指定
        "pageSize": 10,
        "apiKey": api_key  # 自分のAPIキーを指定
    }

    response = requests.get(url, params=parameters,proxies={"http": None, "https": None})
    data = response.json()

    if response.status_code == 200:
        articles = data["articles"]
        news_list = []

        for article in articles:
            title = article["title"]
            source = article["source"]["name"]
            description = article["description"]
            url = article["url"]

            news = {
                "title": title,
                "source": source,
                "description": description,
                "url": url
            }

            news_list.append(news)

        return json.dumps(news_list)

    else:
        print("ニュースの検索に失敗しました。")


@app.get("/news/<string:query>")
async def get_news(query):
    news_json = search_news(query)
    return quart.Response(response=news_json, status=200)

@app.get("/logo.png")
async def plugin_logo():
    filename = 'logo.png'
    return await quart.send_file(filename, mimetype='image/png')

@app.get("/.well-known/ai-plugin.json")
async def plugin_manifest():
    host = request.headers['Host']
    with open("./.well-known/ai-plugin.json") as f:
        text = f.read()
        return quart.Response(text, mimetype="text/json")

@app.get("/openapi.yaml")
async def openapi_spec():
    host = request.headers['Host']
    with open("openapi.yaml") as f:
        text = f.read()
        return quart.Response(text, mimetype="text/yaml")


def main():
    app.run(debug=True, host="0.0.0.0", port=5002)


if __name__ == "__main__":
    main()
クエリを指定してNews APIを実行し、そのレスポンスのタイトルとソース、概要、URLをGetするだけのシンプルなAPIです。
2. マニフェストファイルの作成
マニフェストファイルには、プラグインの名前や概要、ロゴなどを設定します。
{
    "schema_version": "v1",
    "name_for_human": "News Search Plugin",
    "name_for_model": "newssearch",
    "description_for_human": "Plugin for News. You can search news by query.",
    "description_for_model": "Plugin for News. You can search news by query.",
    "auth": {
        "type": "none"
    },
    "api": {
        "type": "openapi",
        "url": "http://localhost:5002/openapi.yaml",
        "is_user_authenticated": false
    },
    "logo_url": "http://localhost:5002/logo.png",
    "contact_email": "dummy@email.com",
    "legal_info_url": "http://www.example.com/legal"
}
肝となるのはdescription_for_modelのところです。ここの説明をみて、ChatGPTがプロンプトに応じてどのプラグインを使用するか判断することになります。
descriptionのベストプラクティスについても公式の方でまとめられているので確認してみてください。
3. OpenAPI ドキュメントの作成
最後にOpenAPIのドキュメントを定義します。OpenAPIのドキュメントを作成することで、ChatGPTに対してこのAPIはどのような機能を持っているのかを知らせることになります。 今回は以下のようなドキュメントを作成しました。
openapi: 3.0.1
info:
  title: News Search Plugin
  description: This plugin allows users to input queries and receive the title, description, and source of the relevant news articles. Upon receiving a query, the plugin utilizes the NewsAPI to fetch the latest news data. It then extracts the title, description, and source information from the retrieved articles and presents them as a response.
  version: 'v1'
servers:
  - url: http://localhost:5002
paths:
  /news/{query}:
    get:
      operationId: getNews
      summary: Get the list of news
      parameters:
      - in: path
        name: query
        schema:
            type: string
        required: true
        description: The search query for news articles.
      responses:
        "200":
          description: OK
          content:
            application/json:
              schema:
                $ref: '#/components/schemas/getNewsResponse'

components:
  schemas:
    getNewsResponse:
      type: object
      properties:
        :
          type: array
          items:
            type: string
          description: The list of news.
動作確認
必要なファイルがすべて作成できたので、実際に動かしてみたいと思います。
まずは作成したAPIをローカルホストで起動します。
$ python serve.py
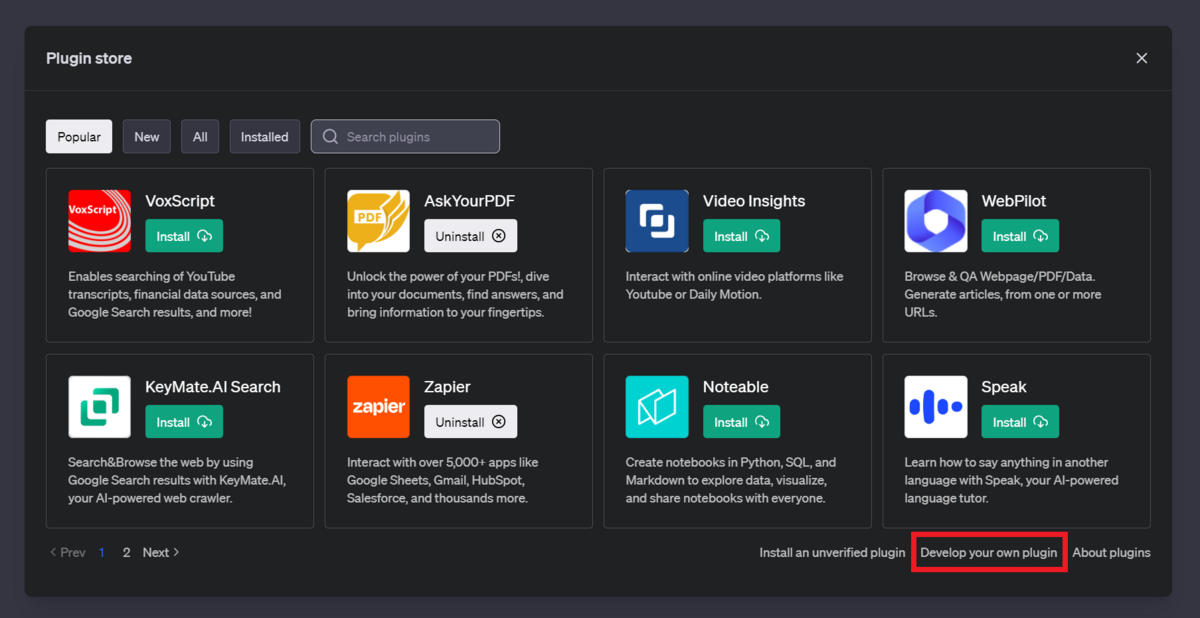
ChatGPT PluginsのDeveloper権限がある場合、Plugin Storeの画面に「Develop your own plugin」という表示があるので選択します。
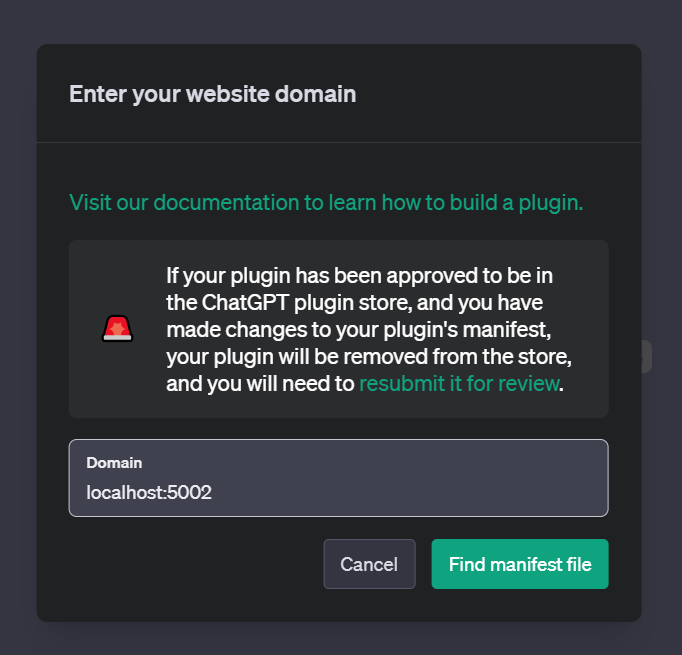
次にドメインを入力します。今回はローカルホストで起動しているので、localhost:5002がドメインとなります。
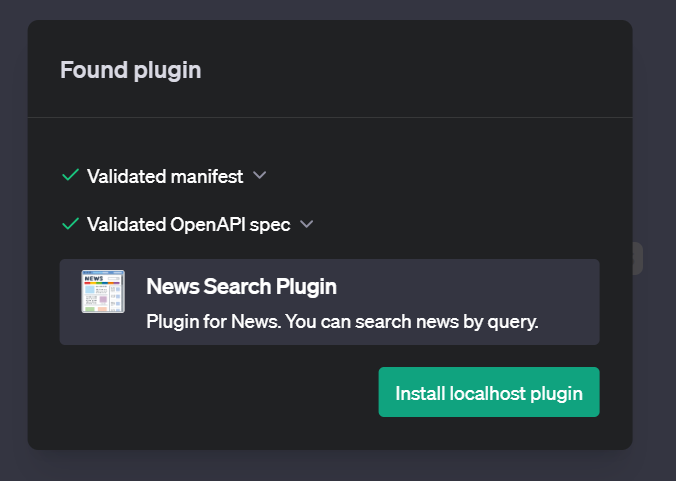
次にマニフェストファイルとOpenAPIドキュメントの検証が行われます。作成したファイルに問題がなければ、緑のチェックマークがつくので「install localhost plugin」を選択します。
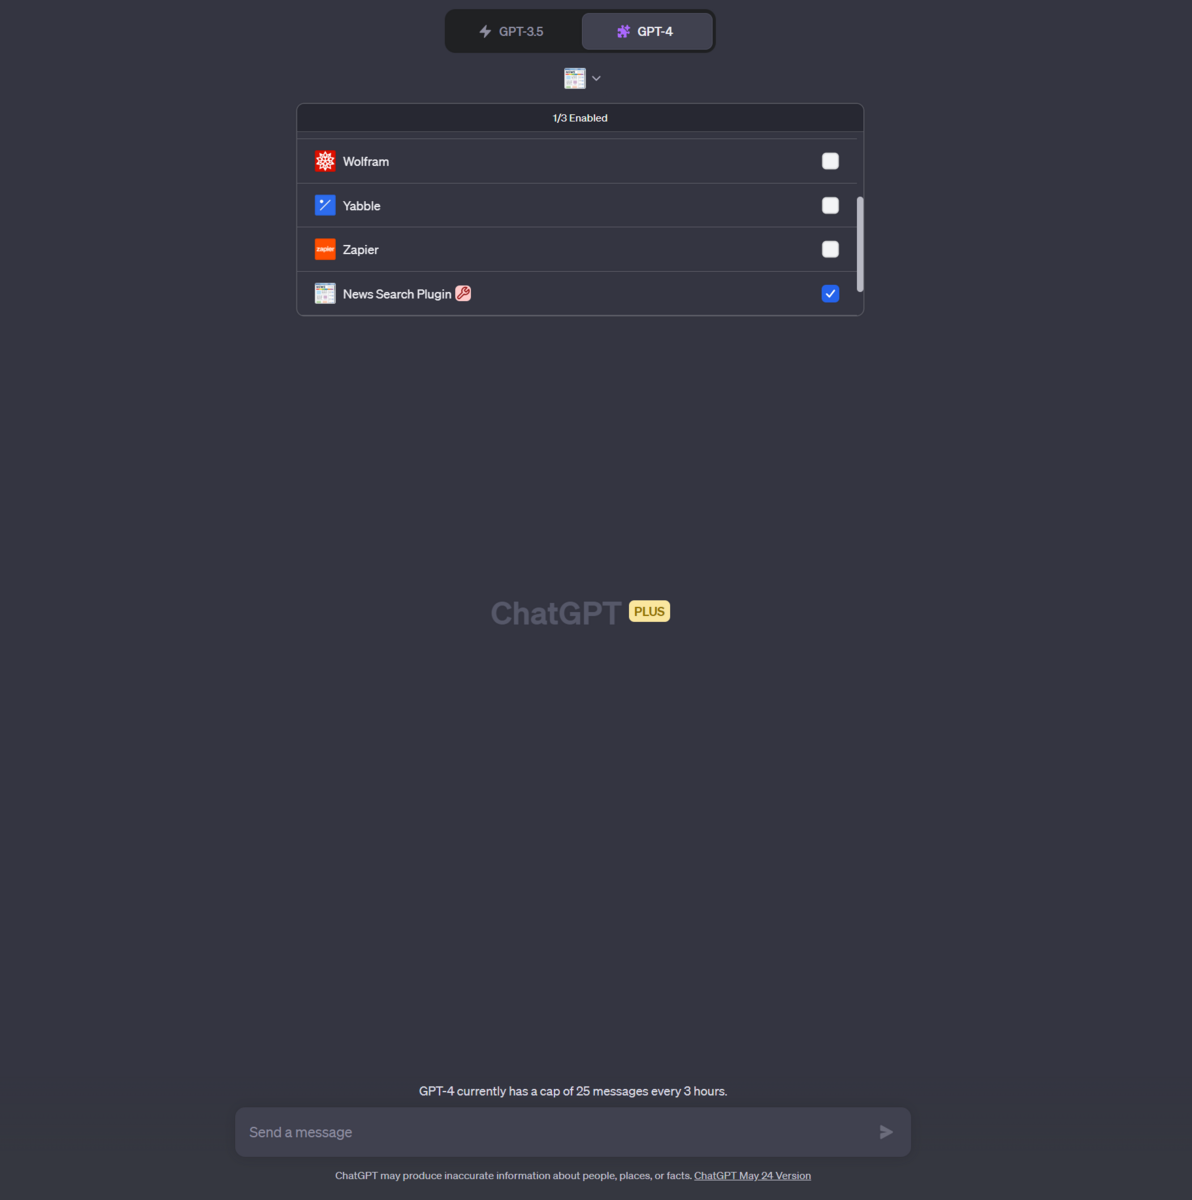
これでインストールできました。作成したプラグインを選択して実際に使ってみます。
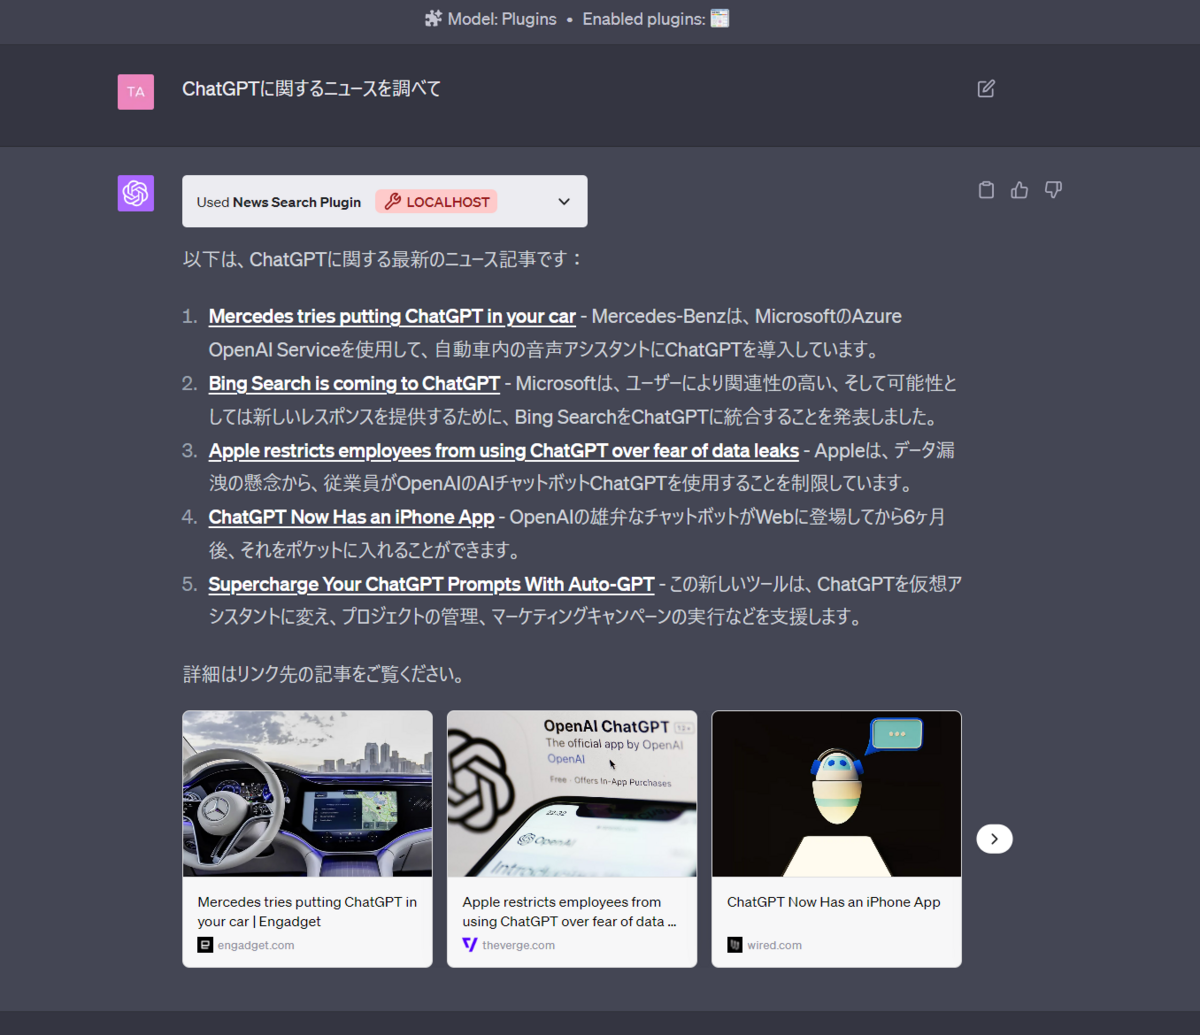
ちゃんと機能しています!特に指示はしてないですがURLを埋め込んでくれたり、いい感じに表示できてますね。
まとめ
今回はChatGPT Pluginを実際に作成してみました。APIさえ作ってしまえば意外と簡単に作れるなというのが感想です。今回は外部のAPIを呼び出すだけのシンプルなものでしたが、ベクトルDBなどを使って自前のデータを扱えるようにするChatGPT Retrieval Pluginなども今後試してみたいと思います。